
OPERATIONS 2.7d - MARKETING
LESSON 5: CONNECTING SOCIAL MEDIA, E-MAIL & TAKING YOUR DOMAIN LIVE
Your progress so far...
Your progress so far ...
Let's reminisce, shall we?
1. You've laid out your foundation for a solid layout
2. You've guided visitors effortlessly with action buttons
3. You've inserted quality brand-compliant content and images
4. You've received Google's approval for display on search engines
I can hardly contain my excitement for you!
Okay, it's time to get this baby connected to people so we can get traffic to your site!
GETTING SITE TRAFFIC WITH SOCIAL MEDIA
It's super important to be connected to social media. Having these "connected accounts" allows others to access your brand the social media accounts you have currently. You will need your login and password information for each social media account you want to connect.
Here's how you add social media accounts on your website:
First, login to your Squarespace account.
Then, go to "Settings" on your Home page:

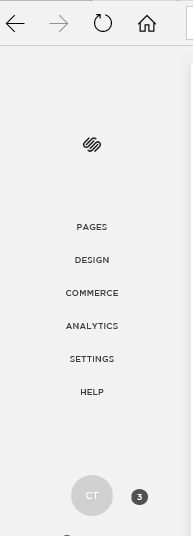
Second, go to "Connected Accounts"

Next, select "Connect Account".
A small window will appear and will let you select a social media account of your choice. A new window will open and ask you to share your password and username. After you enter that information, Squarespace will sync with your social media account, and BOOM!

ou are now connected!
NEXT: CONNECTING EMAIL
When purchasing a domain and membership with Squarespace, you get one free year of G-Suite. This will allow you to have an email address as: yourname@domainname.com.
If you prefer a G-Suite email, go to Settings> Click "E-mail" and select a G-Suite plan with Squarespace.
If you want to use an existing e-mail - go to: Settings>Connect Accounts>Connect E-mail>Enter your existing e-mail address. This will make an "envelope" icon appear next to your social media icons. When someone clicks on the envelope, it will open a window for them to compose an email to you.
Connecting E-mail on Forms
If you have created a form of any kind earlier in this course, you'll need to go back and make sure you can receive emails notifying you when someone has subscribed or e-mailed you.
You can do this by going to the form you created and clicking "edit">Select the "Storage" tab and enter your e-mail address you want to use.to receive notifications of new subscribers and messages from people contacting you.
*You will see options for adding Google Drive, ZapIer, and Mail Chimp - this is not necessary, but I recommend creating a MailChimp account and using that option. MailChimp is great for automatically sending blog posts to subscribers. (We will learn more about all of these tools in OPERATIONS 4)
(Learn more about Mail Chimp in the "Independent Study" section at the end of the course)
NEXT: TAKING YOUR SITE LIVE
At the bottom of your site, you should a message asking you to upgrade:

Click "Upgrade Now".
You'll see plans and prices - Select a plan from "Website Plans" or "Commerce Plans".
I recommend starting with the Basic Plan if you are a blogger, personal brand, or small business that is just starting out.
The prices you see are automatically reduced by 20% on your first annual membership.
You can always upgrade to another plan at your convenience.
Membership includes a FREE domain for one year ($20 savings).
Commerce plans are for e-commerce stores ONLY. So, unless you plan on operating your site as a full-out online store, like Shopify, Etsy, or Amazon, do not select this option!
The end is here.
CONGRATULATIONS, YOU NOW HAVE A WEBSITE!
INDEPENDENT STUDY
MASTERING CONCEPTS
SETTING UP DOMAINS ON SQUARESPACE
CHOOSING THE RIGHT SQUARESPACE PLAN
Start Here↓
Find Your Local Small Business Development Center (US ONLY)
Operation 1: Branding↓
Operation 2: Marketing↓
2.1 - Intro to Buyer's Journey
2.2 - Building Our Prospect Journey
2.3 - Building Our Lead Journey
2.4 - Building Our Customer Journey
2.5 - Finishing Our Buyer's Journey
2.6 - Testing Our Buyer's Journey
2.7 - Creating A Journey On Our Website
2.7a - Laying Your Foundation for Branded Content and Images
2.7b - Guiding Website Visitors with Action Buttons
2.7c - Styling Your Website and Adding SEO
2.7d - Taking Your Domain Live
Operation 3: Sales↓
3.1 - Tracking Sales Activities
3.2 - Creating Sales Activities
3.3 - Creating Next Level Engagements
3.4 - Creating Resources for Next Level Engagements